How to Install UV Dynamics Water Filter Disinfection System
Before you start check to be sure your source water meets these requirements or you will need us to treat your water before the UV.
Turbidity 1 NTU
Suspended Solids 10mg/L
Colour None
Total Iron 0.3 mg/L
Manganese 0.05 mg/L
Hardness 7 gpg
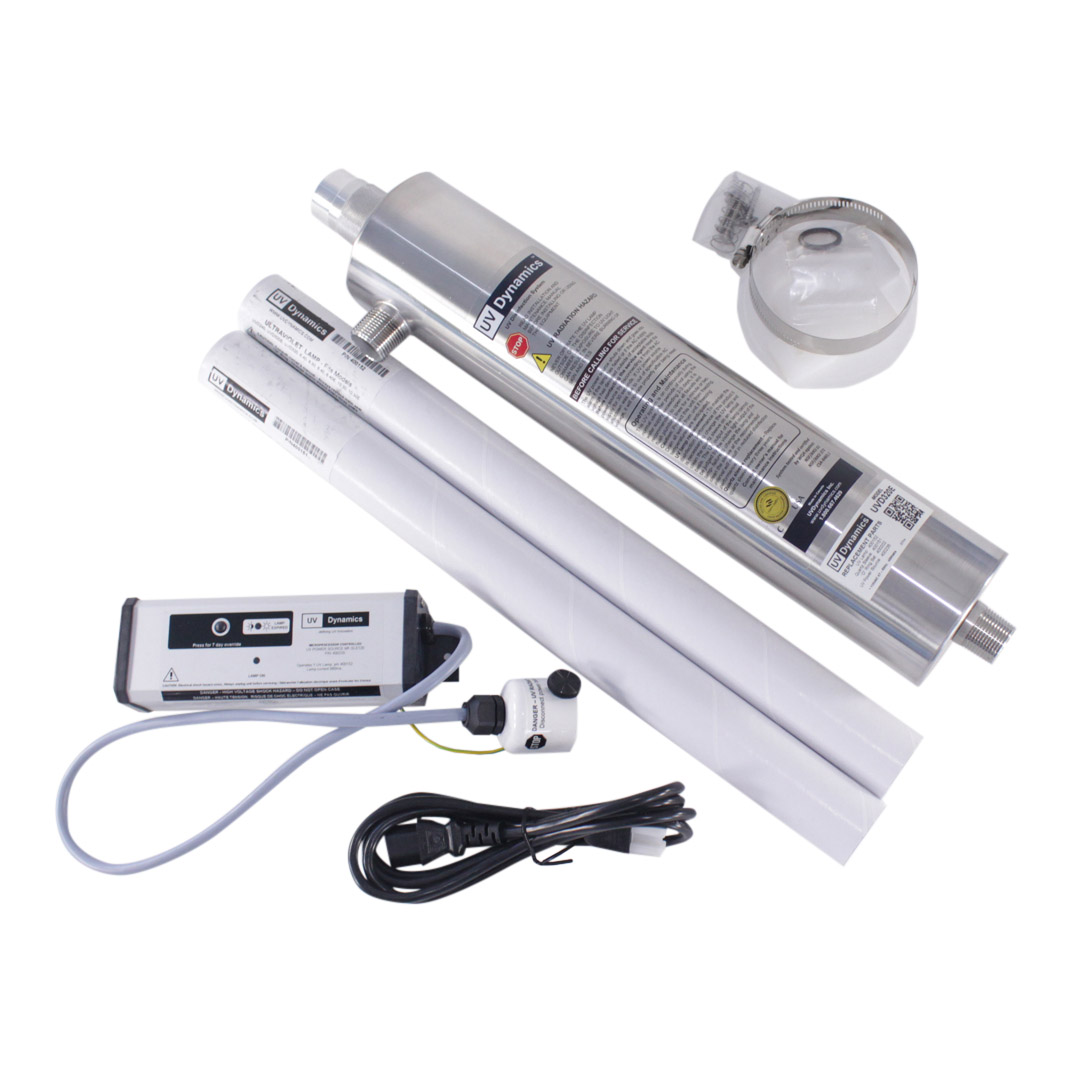
Your UV Dynamics Ultraviolet disinfection system should be the last step of your water treatment system. Choose a location for installation with a nearby electrical outlet. Note the direction of water flow coming from your pressure tank. You will need a minimum of 17” clearance at the lamp cord end of the chamber for maintenance procedures to be performed without removing the disinfection chamber from its mounting bracket.
I always recommend a 10″ Big Blue 5 micron sediment pre filter unless you have only one bathroom, then a 10″ slimline will be fine or if your house has 4 or more bathrooms or 1″ plumbing a 20″ Big blue would be better. The housing needs to be mounted where you have access to easily replace the filter in the future and so any water being spilled during filter replacement will not splash into or onto electrical components.
1. Shut off the main water supply valve or pump.
2. Mount the UV to the wall using the mounting bracket provided. Mount ballast on the wall above UV chamber.
3. Install new plumbing as shoen in the video below. When installing the 5- micron pre-filter, make sure the flow arrows on the filter housing point in the same direction as the water flow. If soldering, be sure not to allow heat near plastic threads or fittings.
4. Place the thinner “O” ring into the groove of the gland nut holder, and the thicker “O” ring on the open end of the quartz sleeve. Then push the quartz sleeve into the gland nut until the sleeve touches the top.
5. Place the quartz sleeve into the opening at the top of the UV chamber and screw it into place, hand tight.
6. Place the lamp spring and the lamp into the quartz sleeve and, holding the top of the lamp, attach lamp to the lamp connector. Push the lamp connector down snugly into the gland nut and tighten the retainer screw. Do not over tighten as plastic threads are easily damaged
7. Remove the nut from the ground stud at the top of the unit. Next place the ground wire, green wire with yellow stripe over the stud and re-install nut and tighten.
8. Open the valves on either side of the disinfection chamber. Check for leaks. Open supply valve slowly and bleed air from system.
9. Connect UV power source to AC line. UV power source audio alarm will sound three times before igniting the lamp. Your UV Dynamics disinfection system is now ready for service but before service begins, all household plumbing lines should be chemically disinfected.