How to Replace Lamp and Service UV Dynamic Water Filter System
Changing the UV Dynamics UV System Lamp is easy and very straight forward, just follow this procedure.
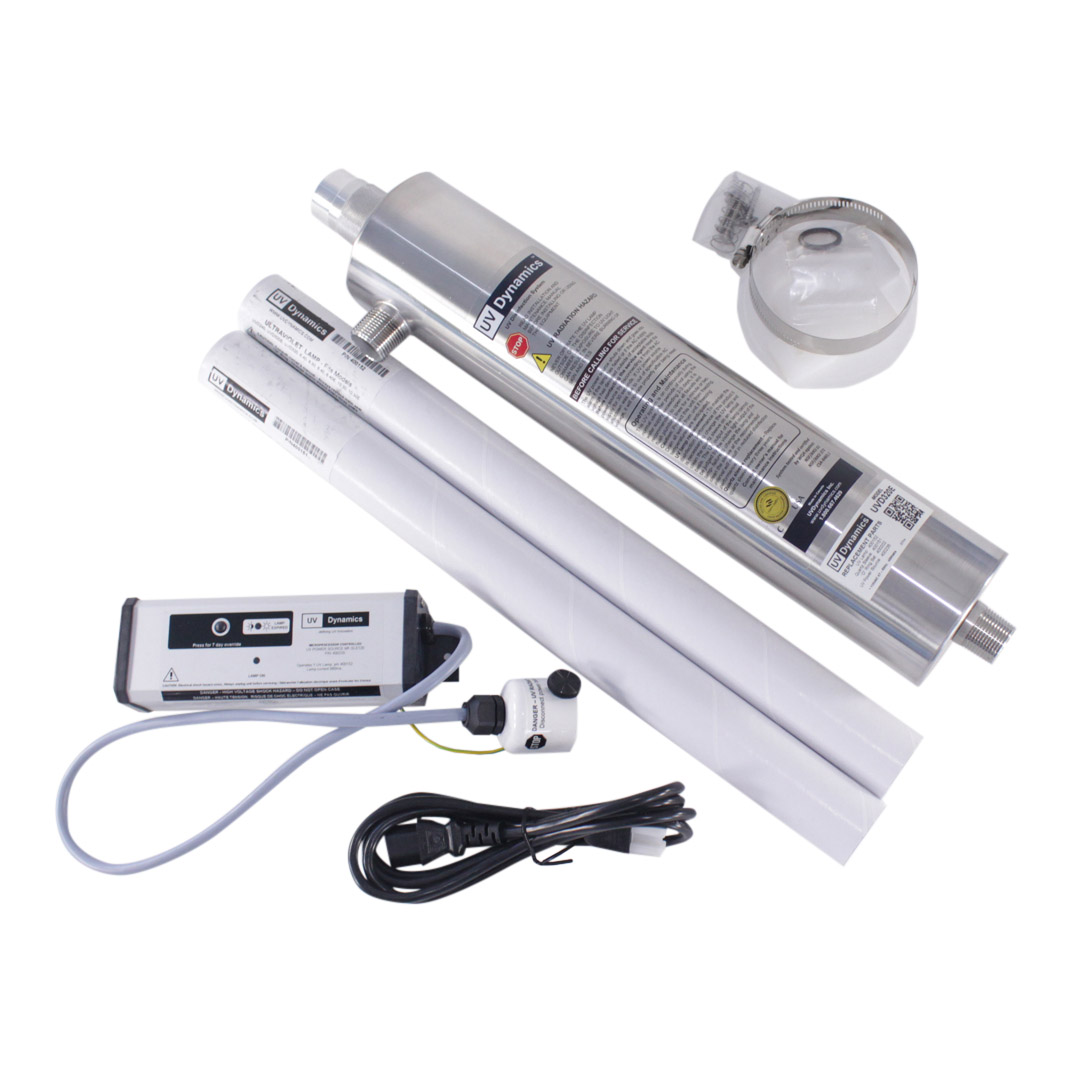
Be careful not to touch the lamp or the quartz sleeve during this procedure. Handle only by ends only or with a cloth.
1. Unplug the UV from the electrical outlet and shut off all water supplies to the UV.
2. Remove the lamp connector from the sleeve gland nut assembly to see just the top of the lamp. While holding the lamp base firmly, remove the lamp power connector by pulling away. Caution: lamp base can be very hot – be careful not to drop lamp into quartz sleeve as it either one can be easily broken.
3. Slide the UV lamp out of the quartz sleeve and dispose according to local regulations.
4. Remove the quartz sleeve by loosening the gland nut and carefully removing it from the UV. Caution: The quartz sleeve is very fragile and is easily chipped or broken – be very careful when removing or installing.
5. Clean the quartz sleeve with a vinegar solution or a scale removal product like Limeaway or CLR.
6. Re-install the quartz sleeve and replace the “O” ring if it appears to be damaged.
7. Install new lamp by reversing the procedure described in step 2 above.
8. Slowly open water supply valve and purge air from system – be sure that there are no leaks before reconnecting to power.
RESETTING THE LAMP CHANGE TIMER
The lamp change reminder timer is reset by disconnecting the UV power source from the AC supply, waiting for fifteen seconds and reconnecting to the power supply with the timer button depressed. The UV power source or ballast will sound a three-second beep indicating that the reset was successful. It’s impossible to reset the timer unless the it is in the grace or lamp change alarm mode. If you need to reset it before the full one-year time period has expired due to premature lamp failure, there are special instructions included with the replacement lamps describing the procedure.